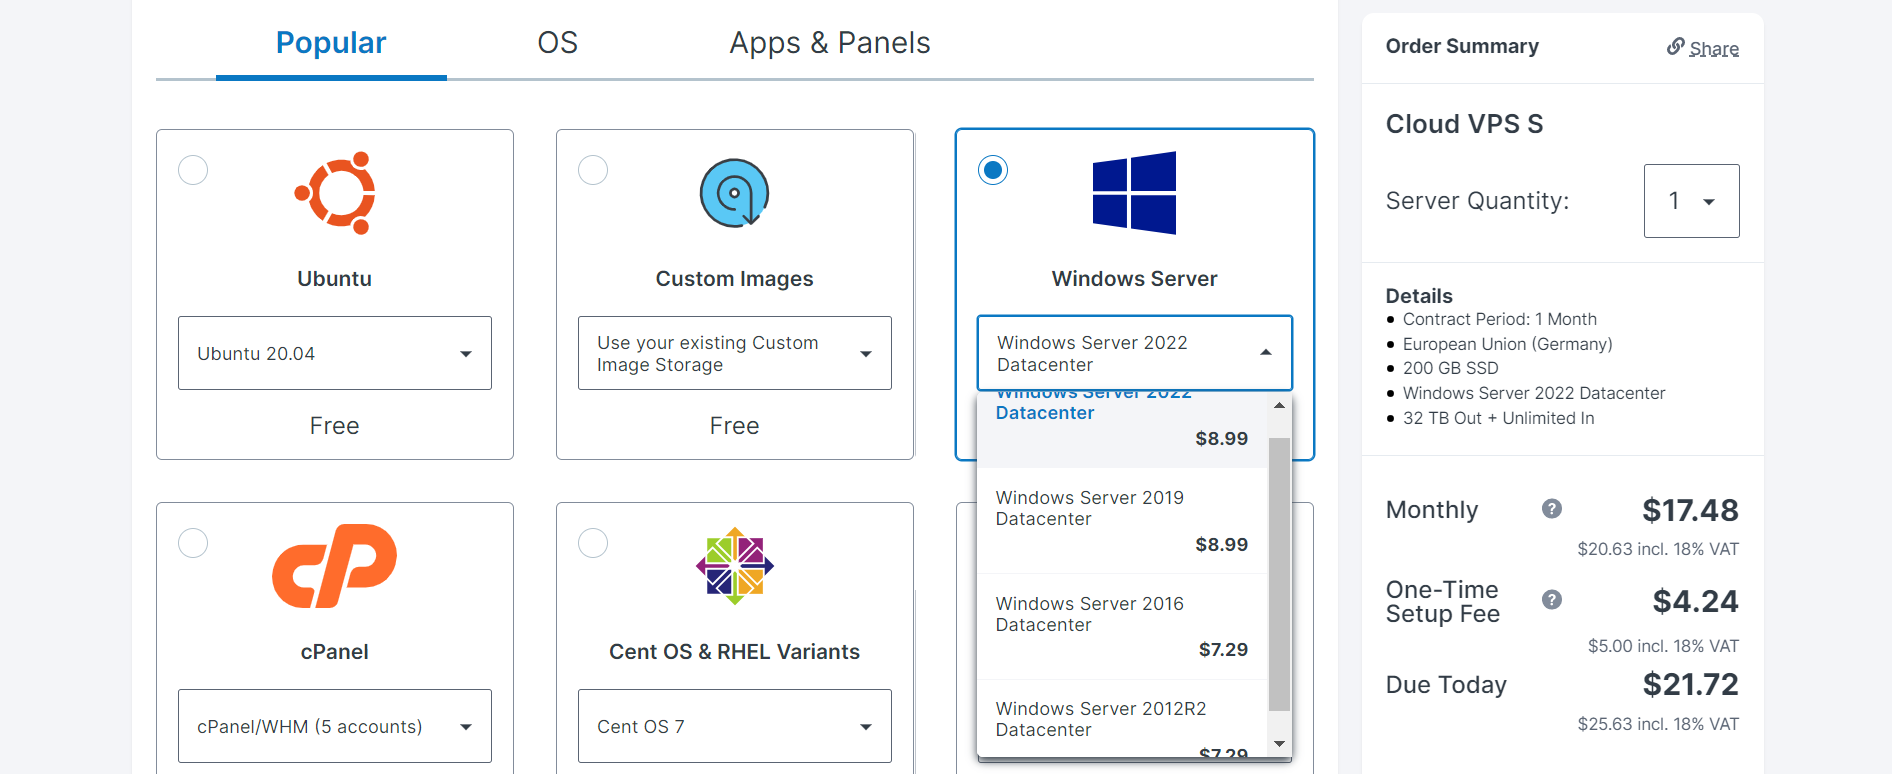
Contabo is a widely recognized VPS provider specially for their budget-friendly Linux based servers. Now I would like to request you to read that first line again, yes they offers cost-effective server solutions based on Linux distributions. But for Windows, their budget-friendly nature how seamlessly becomes an enemy for your budget, their user interface doesn’t even give a clue but you will get to know about it through after seeing an image given below:
Now here I want to ask you a question. How about if we take their server with Linux distribution from them and install Windows Server with the ISO method which we have already did in DigitalOcean, Linode or Hetzner?
In this article, I will walk you through the process of installing Windows on a Contabo VPS, ensuring a seamless experience.
Buy VPS
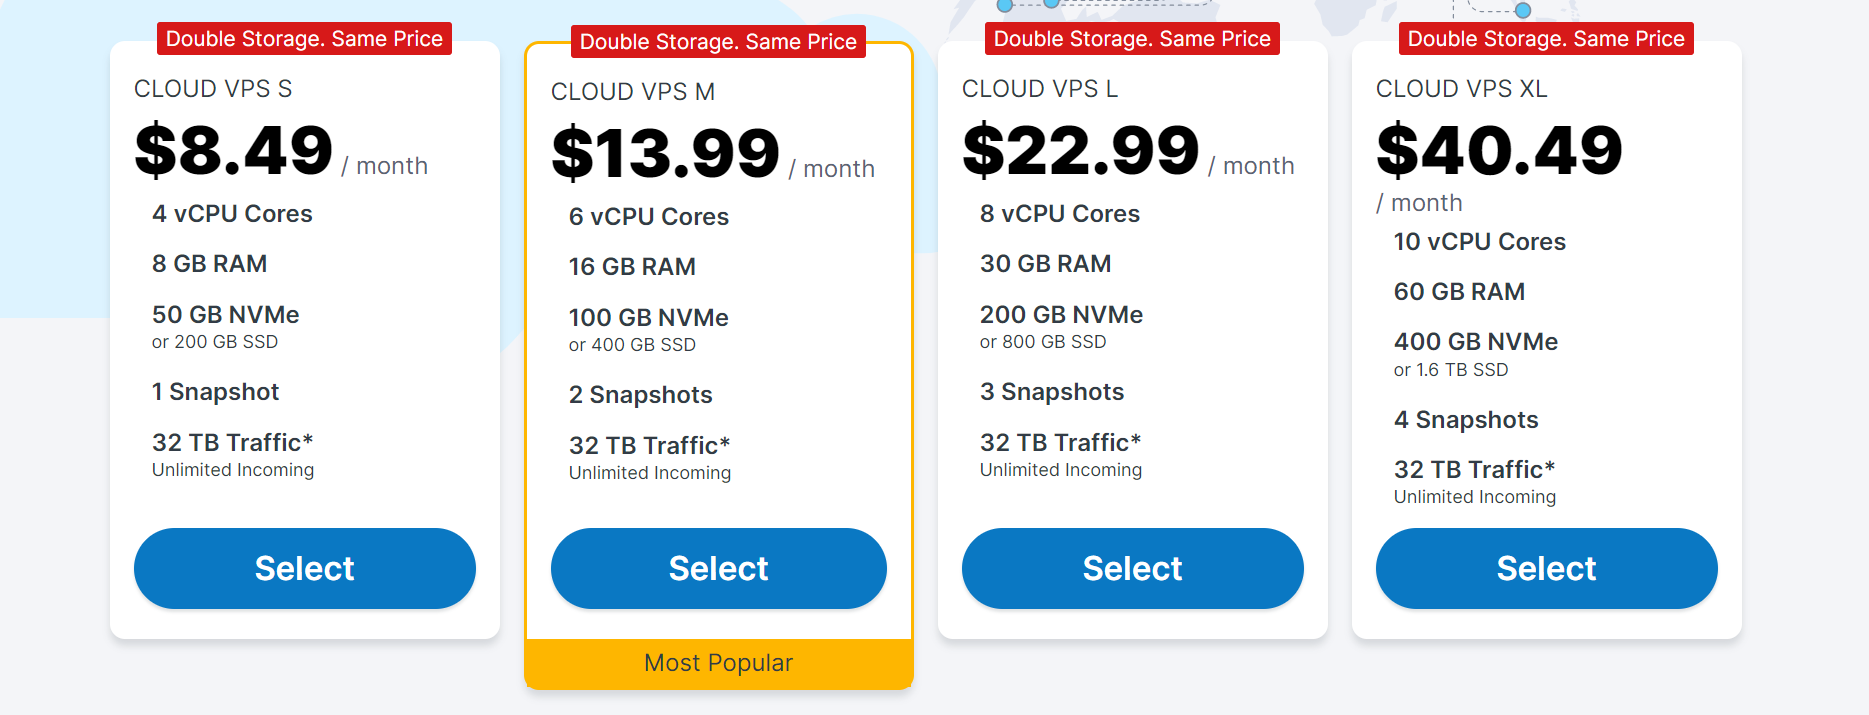
On the homepage, click on the “VPS” option in the navigation menu. Contabo offers various VPS plans with different resources and prices. Review the available plans and select the one that best fits your needs.
>>Click here to save one time setup fee
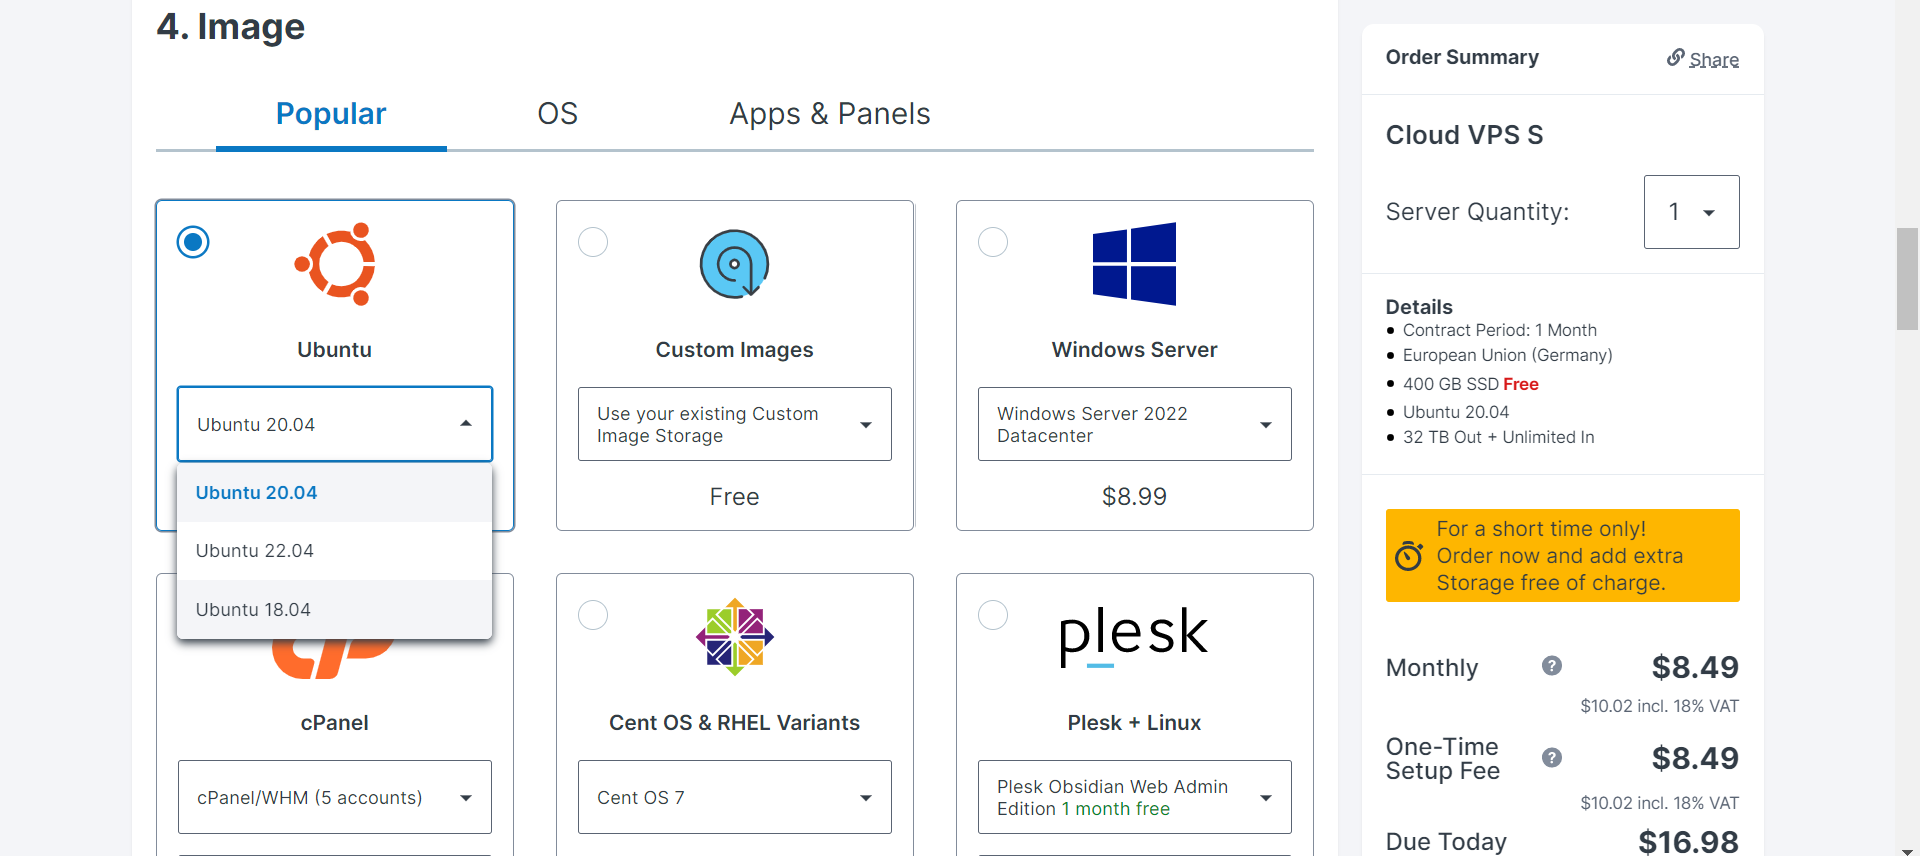
After selecting a plan, you will need to configure your VPS. Choose the operating system (OS) you want to use, the data center location, and any additional features or resources you may need, such as extra IP addresses. But for following this guide, you just need to select Ubuntu 20.04 as your OS and can go with single(default) IP address.
Check your selected VPS plan and configurations in the cart. If you need to make any changes, click the “Edit” button next to the corresponding item. If everything looks good, click the “Proceed to checkout” button and If you are a new customer, you will need to create a Contabo account by providing your email address and creating a password. If you already have an account, simply log in with your credentials.
Rescue System
In the VPS control panel, look for the “Rescue System” section. Select the “Debian 10 – Live” in version and confirm your VPS password and click the “Start rescue system” button to enable rescue mode. Contabo will automatically reboot your VPS into a temporary Linux environment with a pre-configured network.

Connect VNC
If you haven’t already, download and install VNC Viewer on your computer. VNC Viewer is available for Windows, macOS, and Linux. You can download it from the official website.
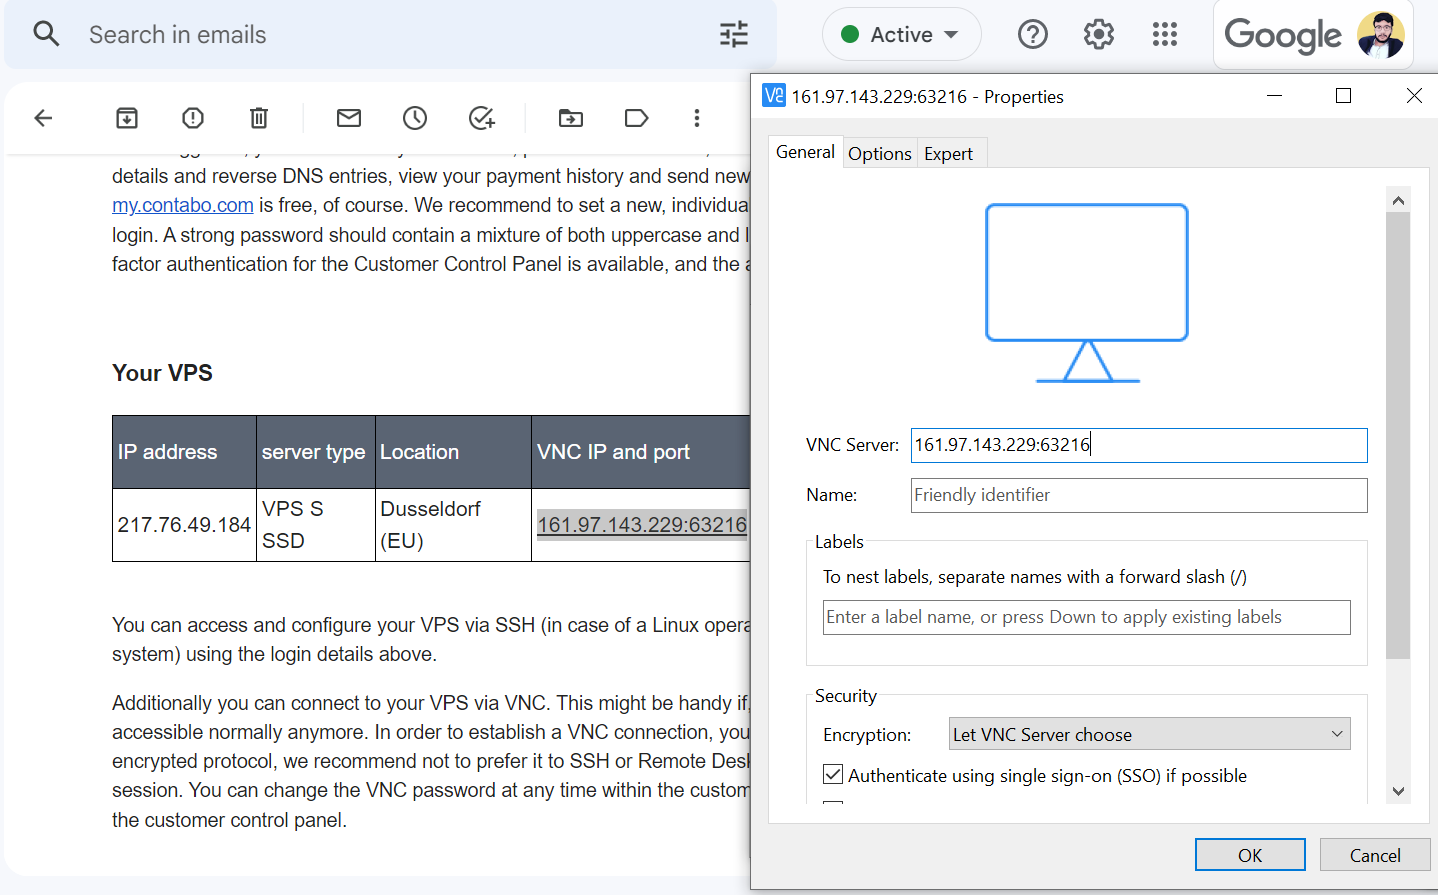
You’ll need the VNC IP address, VNC port number, and VNC password to connect. These details are usually provided by Contabo when you set up a new VPS and your payment has been processed. If you don’t have this information, you can typically find it in your VPS control panel or by contacting their support team.
Press the ‘Enter’ key or click the ‘Connect’ button to initiate the connection.

Now click Terminal icon in the bottom (second option from left side) and run:
sudo su
To switch to the superuser (root) account temporarily.
After that, run:
apt install gparted filezilla grub2 wimtools -y
For installing all four software packages (gparted, filezilla, grub2, and wimtools) and automatically confirms any prompts with a “yes” response.
Press down arrow key and space bar to OK, then mark the available disk top put on by pressing the space bar key and then select Yes to confirm.
Now we have to run:
gparted
To launch GParted, a free and open-source graphical partition editor for managing disk partitions and filesystems on Linux-based systems. GParted stands for GNOME Partition Editor, and it is a convenient tool for creating, resizing, deleting, and modifying disk partitions without requiring users to understand complex command-line tools.
We need to delete all existing partitions, and split the disk drive into 3 parts (leave the larger portion of the disk as unmarked because we have to perform windows installation on that space) and the other two parts with 15-20GB disk space for each drive as NTFS.
Now we need to run:
gdisk /dev/sda
and it opens the gdisk utility and targets the first disk device, typically represented as /dev/sda on Linux-based systems. Within the gdisk utility, you can perform various operations on the GPT disk, such as creating, deleting, and modifying partitions, as well as converting between MBR and GPT partitioning schemes.
Press these keys one after one prompts to make this partition bootable:
r

g

p

w

Y
After that, run:
mount /dev/sda1 /mnt
To mount a specific partition, in this case /dev/sda1, to a directory on the file system, in this case /mnt.
Now run this command to change the current working directory to the user’s home directory:
cd~
And make a new directory inside user’s present working directory by running:
mkdir directory_name_here
*directory_name_here means whatever the name you can define
Now run:
mount /dev/sda2 directory_name_here
To mount a specific partition, in this case /dev/sda2, to a directory on the file system, where directory_name_here should be replaced with the actual directory path where you want to mount the partition.
After that, run this:
grub-install --root-directory=/mnt /dev/sda
To install the GRUB bootloader to a specific disk device, in this case /dev/sda, while using a specified root directory, in this case /mnt. GRUB (GRand Unified Bootloader) is a widely-used bootloader that supports multiple operating systems, allowing users to choose which OS to boot during startup.
Now navigate path to that directory:
cd /mnt/boot/grub
and open configuration file through nano editor:
nano grub.cfg
And create a GRUB menu by writing the following code inside the configuration file:
menuentry "windows installer" {
insmod ntfs
search --set=root --file=/bootmgr
ntldr /bootmgr
boot
}
To save changes, press CTRL + X, then press Y, then Enter.
Now change directory to the:
cd /root/directory_name_here
And create a new directory inside directory_name_here:
mkdir directory_inside_directory_name_here
Download Windows ISO
wget -O win10.iso https://bit.ly/tswin10
When you run this command, wget will download the ISO file from the specified URL and save it as win10.iso in the current working directory. Keep in mind that the actual file being downloaded might be large, so the download may take some time depending on your internet connection speed.
>>How to Download Windows 10 ISO File from Microsoft’s Official Website
Mount ISO
mount -o loop win10.iso directory_inside_directory_name_here
This command will mount an ISO file, in our case win10.iso, to a directory on the file system, where directory_inside_directory_name_here should be replaced with the actual directory path where you want to mount the ISO file.
rsync -avz --progress directory_inside_directory_name_here/* /mnt
This command will use the rsync utility to copy the contents of the directory_inside_directory_name_here directory to the /mnt directory, while preserving file attributes, compressing the data during transfer, and displaying progress information.
Unmount ISO
umount directory_inside_directory_name_here
After successfully executing the command, the mounted resource will be detached from the specified directory, and its contents will no longer be accessible under that directory.
Download VirtIO Drivers
wget -O virtio.iso https://bit.ly/tsvirtio
This command will download the virtio-win-0.1.185.iso file and save it as virtio.iso in the current working directory. This file contains the VirtIO drivers needed when setting up a Windows virtual machine with optimized performance on hypervisors like KVM or Proxmox that use VirtIO for paravirtualized devices.
Mount Virtio Drivers
mount -o loop virtio.iso directory_inside_directory_name_here
This command will mount an ISO file, in this case virtio.iso, to a directory on the file system, where directory_inside_directory_name_here should be replaced with the actual directory path where you want to mount the ISO file.
Then create a new directory inside /mnt/sources by running:
mkdir /mnt/sources/virtio
*again you can replace/give any name instead of virtio
This command will use the rsync utility to copy the contents of the wincd directory to the /mnt/sources/virtio directory, while preserving file attributes, compressing the data during transfer, and displaying progress information.
Now change pwd to /mnt/sources by running:
cd /mnt/sources
Now create a new, empty file inside the current working directory by running:
touch cmd.txt
*again you can specify any name in place of cmd
Now run:
echo 'add virtio /virtio_drivers' >> cmd.txt
To append the text add virtio /virtio_drivers to the file cmd.txt. If the file does not already exist, it will be created.
wimlib-imagex update boot.wim 2 < cmd.txt
This command will use the wimlib-imagex utility to update a Windows Imaging (WIM) file by applying a set of commands stored in the cmd.txt file. In this example, it updates the boot.wim file, specifically image index 2, with the commands from cmd.txt.
Reboot
To restart your server, run:
reboot
Upon executing this command, you will be prompted to provide drivers during the loading process. Choose the Boot(X:)/virtio_drivers/amd64/ directory, and then select your operating system (e.g., Windows 10).
After downloading and completing the initial setup, proceed to add the drivers for the network and PCI device. During the installation, specify the Boot(X:)/virtio_drivers folder and enable the “search in subfolders” option by checking the corresponding box.
Allow Remote Connection
To allow remote connections on a Windows 10:
- Right-click on the Start button and select “Settings”.
- In the Settings window, click on “System”.
- In the left sidebar, scroll down and click on “Remote Desktop”.
- Toggle the switch to “On” under the “Enable Remote Desktop” section.
- A warning message about making your device discoverable on the network may appear. Click on “Confirm” to proceed.


Hi! Thank you so much, it was very useful!
I would like to ask you, it may be my browser, but im missing this command after mounting the drivers and creating the folder.
rsync -avz –progress directory_inside_directory_name_here/* /mnt/sources/virtio
In the associated youtube video is also missing, it made it more difficult.
When I start windows my folder “virtio_drivers” is empty, maybe because your above mentioned command is missing. When exactly to write this command?
very very thanks full sir, it work
Then mkdir /mnt/sources/virtio
rsync -avz –progress directory_inside_directory_name_here/* /mnt/sources/virtio
And is it possible to do it without starting from the very beginning again?
Unfortunately below command does not work and gives a error.. Package File Not Found :-
apt install grub2 -y