
1. Install Sendmail:
$ sudo apt-get install sendmail
2. Configure /etc/hosts file:
Run:
$ hostname
To find your hostname
Then copy the same hostname, and run:
$ sudo nano /etc/hosts
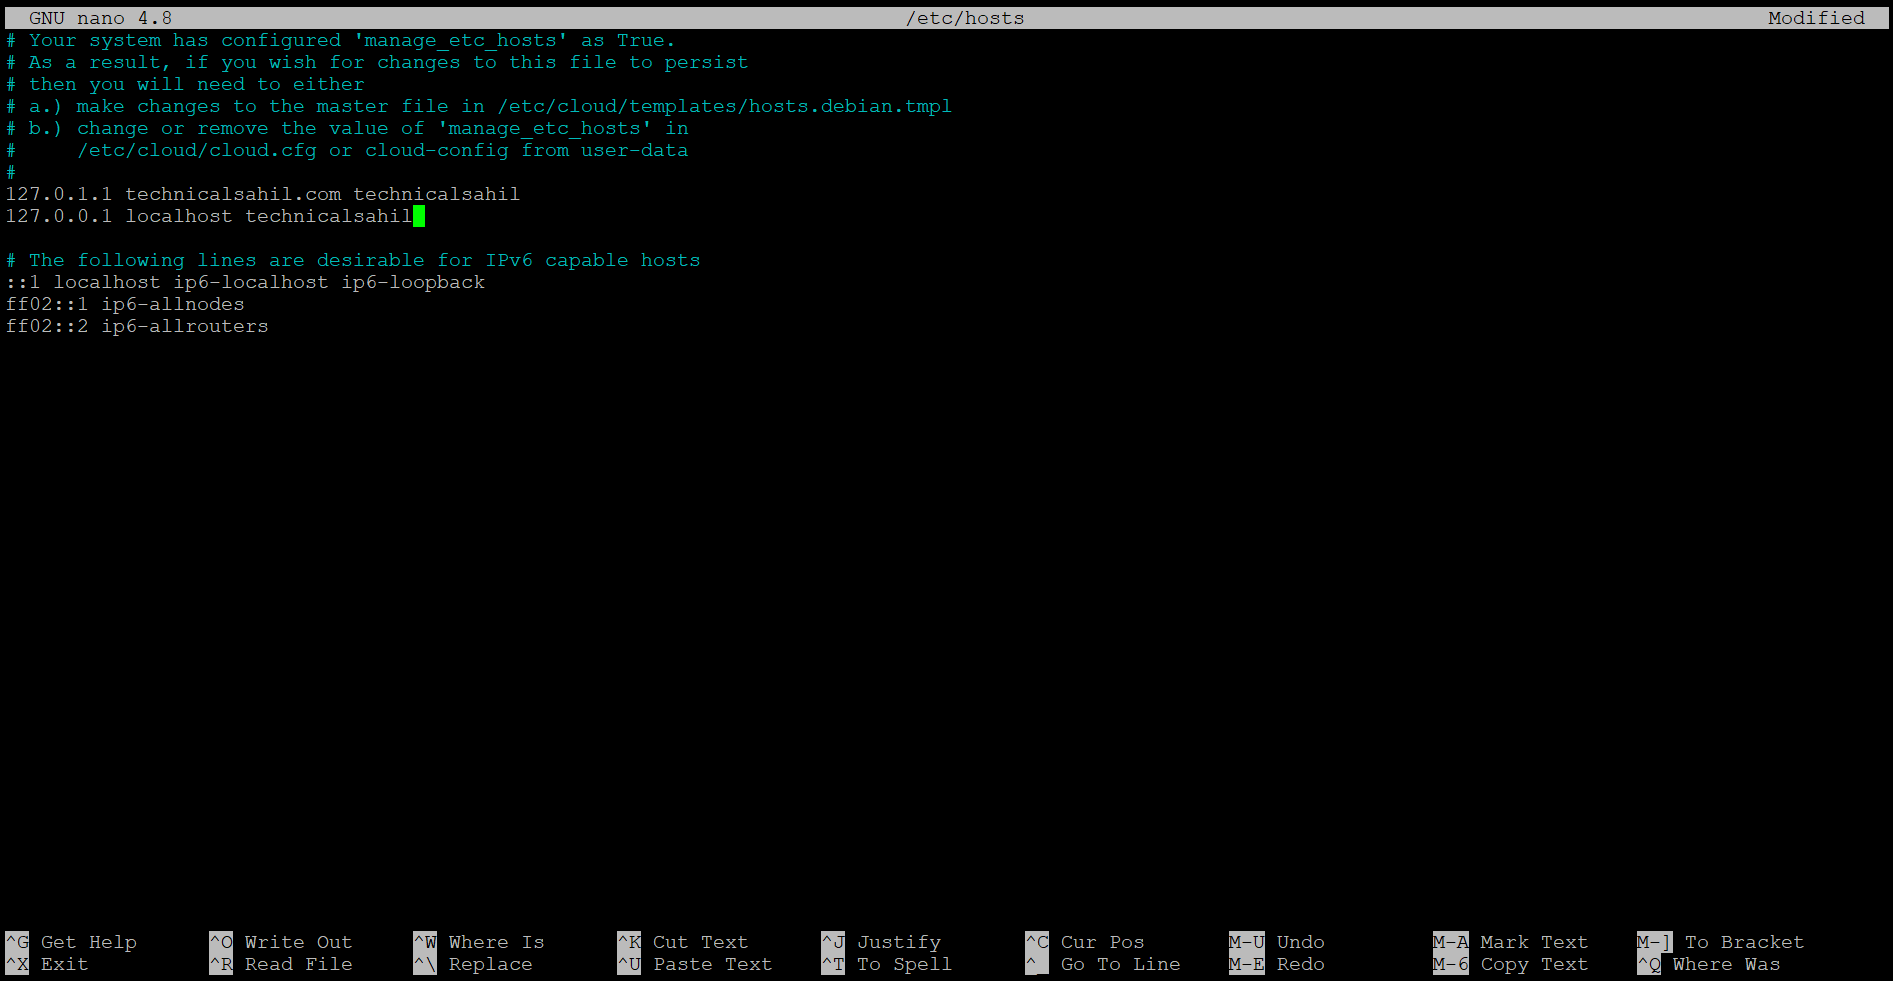
On the second line starting with 127.0.0.1, add the hostname to the end so it looks like the same as:
127.0.0.1 localhost your_hostname_here
(You will notice that your hostname can also be identified on the line that starts with 127.0.1.1 where it appears twice).
Then Press CTRl+X, then type ‘Y’ and press ENTER to save changes.
3. Run Sendmail’s config and answer ‘Y’ (May be three times it will ask for input):
$ sudo sendmailconfig
4. Restart Your Apache Service:
$ sudo service apache2 restart
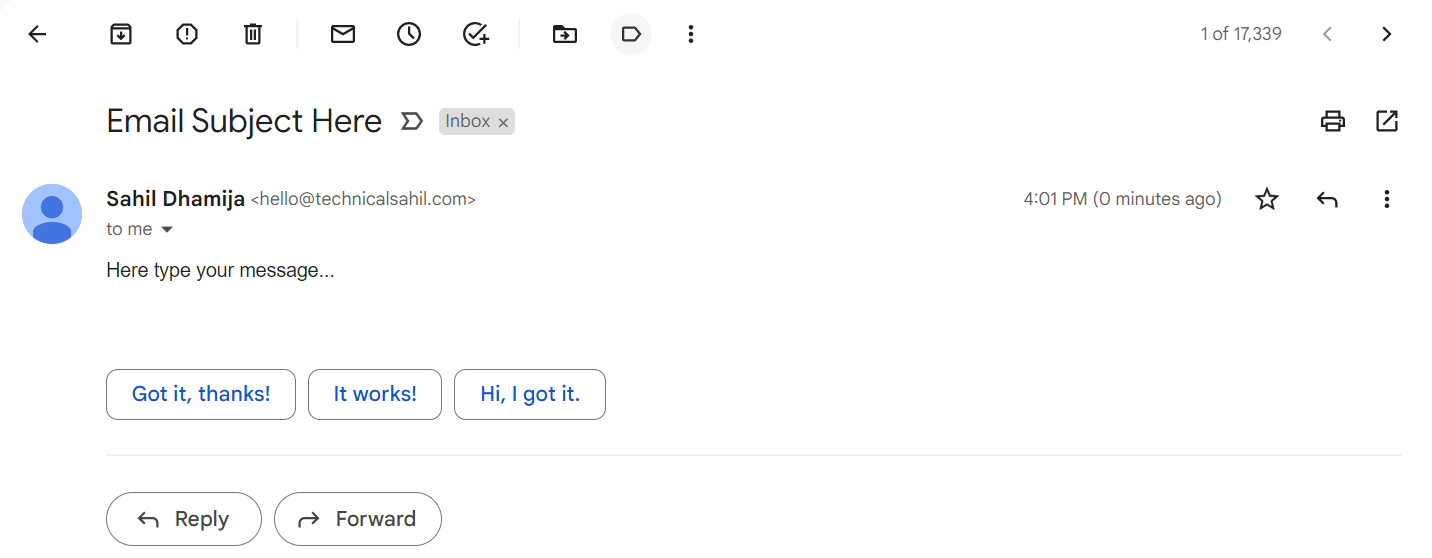
5. Now You Can Start Using Sendmail:
$ sendmail -v receiver@mail.com
Press ENTER
From: sender@mail.com
Press ENTER
Subject: Email Subject Here
Press ENTER
Here type your message...
Press ENTER
.
Press ENTER

Wait for sometime till then you will see the output of your email has been sent.
6. Troubleshoot:
If for some reason, you’re receiver doesn’t receives the email. Here are the steps you can follow to troubleshoot the reason.
$ sudo nano /etc/php/7.0/fpm/php.ini
Press Ctrl+W to search for and find ‘sendmail_path’. Uncomment this line and add the path below:
sendmail_path= /usr/sbin/sendmail -t -i
Then Press CTRl+X, then type ‘Y’ and press ENTER to save changes.
After that, Restart PHP Service:
$ sudo service php7.0-fpm restart
I would like to thank you for the efforts youve put in penning this website. I really hope to check out the same high-grade content by you later on as well. In truth, your creative writing abilities has encouraged me to get my own website now 😉
The point of view of your article has taught me a lot, and I already know how to improve the paper on gate.oi, thank you. https://www.gate.io/de/signup/XwNAU
The point of view of your article has taught me a lot, and I already know how to improve the paper on gate.oi, thank you. https://www.gate.io/ru/signup/XwNAU
Your point of view caught my eye and was very interesting. Thanks. I have a question for you. https://accounts.binance.com/en/register?ref=P9L9FQKY
This article opened my eyes, I can feel your mood, your thoughts, it seems very wonderful. I hope to see more articles like this. thanks for sharing.
Almanya berlin’de en iyi berlin medyum hoca arıyorsanız Hiç çekindemeden hemen medyum hocamız ile iletişime geçebilirsiniz.
Today, I went to the beachfront with my kids. I found a sea shell and gave it to my 4 year old daughter and said “You can hear the ocean if you put this to your ear.” She placed the shell to her ear and screamed. There was a hermit crab inside and it pinched her ear. She never wants to go back! LoL I know this is completely off topic but I had to tell someone!
I’m really impressed with your writing skills as well as with the layout on your weblog. Is this a paid theme or did you customize it yourself? Anyway keep up the nice quality writing, it is rare to see a great blog like this one today..